The shocks are back! Insert bad pun here. Towards the end of september I was able to speak to Nitron and they said they would ship on or about the 21st. On that very day they emailed me a tracking number as requested and they arrived at Meridian Motorsport on the 24th or 25th.
In the intereset of fairness I have to say they were packed and labeled beautifully, as we were worried we'd be getting someone else's shocks back, and they had been clearly well looked after. It seems that getting them repaired had required substantially more tooling remanufacture than previously anticipated, hence the delay. In terms of the future, apparently they are arranging someone to carry out these repairs in Australia so things should be smoother. Our final comment is that we live in the real world were nothing runs smoothly all the time. However, if companies keep you updated it's a lot easier to deal with.
As expected we spent wednesday 26th of sept. bolting the shocks back on and went for a quick spin in the evening. It would have been earlier but I forgot to charge the battery. I am a spanner. As anyone who has driven a clubman can tell you it was worth the wait. Each crackle of the exhaust on overrun had us giggling like infants and we had a ball. There is nothing like these cars to make you feel connected to the road and elements (and insects) although I have to ignore my bike riding mates who say otherwise. Bring on the summer.......
Saturday, October 20, 2012
Saturday, August 25, 2012
Racing Red Shocks by Nitron
In the interests of honesty I will relate our experience, from which you can draw your own conclusions.
During the build process and before the car was even running, we noticed a small leak of oil on the shaft of one of our Racing Red shock absorbers. Eventually, the end cap was forced off by the pressure and a whole lot more oil appeared. We were informed that this was a "known issue" by the distributer and that a solution was being arranged with the company. Apparantly a seal gland was incorrectly manufactured and this lead to the leak.
I'd rather like to believe that "known issues" with suspension components would lead to some sort of warning to customers to check their shocks, but, hey ho, what can you do? While the car was having its suspension aligned the guys noticed another of the shocks was leaking so now we had two fail out of four, which wasn't reassuring.
However, what has really prompted this posting is the subsequent fiasco. We pointed out this leak midway through 2011. It is now approaching the end of August 2012 and we still do not have our shocks back.
It took until June 2012 before it was decided that the shocks needed to be returned the the uk for repair and during this time we received no communication whatsoever from the company. They have now had them for two months and we have only received scanty updates via the distributer which they only obtained by repeatedly emailing them. Incidently, I called the company myself and was met by radio silence.
I really don't care why it took so long to organise - these things occasionally happen. And fortunately the weather has been pretty epic lately in Melbourne and not suitable for quick fangs in a sports cars. But eventually the summer will arrive and if they're not back by then we will be very unhappy campers.
Still, at least it allowed us time to fix the big end...........!
Sunday, August 19, 2012
Knock knock knocking......yes, it's the big end!
During the last few shake down runs we noticed a clatter from the engine. Hard to locate and at first it sounded like the top end. We disconnected the injectors sequentially to see if it was from a particular cyclinder bottom end but that didn't help. Sadly, on the run back from the registration appointment the noise became much more obviously bottom end. Eek! Or words to that effect (possibly more Anglo-Saxon.)
 The sump was duly dropped and the cause confirmed. I'm no expert but a sump should not look like it's been used for silver panning. I think it was caused during brake testing when I had had a momentary drop in oil pressure. A split second, but thats all it needed to melt a bearing. A top up of 250mls of oil cured the drop but it looks like the damage had been done
Ford claims the short block is non servicable - it's not even mentioned in the Haynes manual - but that's never stopped us. We removed the big end caps and bearings, which was easy, followed by the main bearings, which was not. The bearing ladder is fun as you don't want to rock it and damage surfaces . We had to weld a socket to the end of an angled spanner in order to remove the bolts that go through the bearing seal - they're tucked behind the fly wheel under a lip and no spanner I had would reach them.

Number 1 cylinder bearings were melted, and the rest were starting to go, but fortunately the journals were ok. The main beaings looked pretty good but we decided to replace them at the same time. These can be removed by spinning them out one by one. We used a "spatula" made out of some thick plastic and wooden pushers made from dowl that had been filed flat at the edge to ensure nothing marked the surfaces. Once they started to move you could rotate the crankshaft and spin them out the rest of the way. Its best to replace each one as you go along or the crankshaft moves slighly on its axis, making replacement much more difficult. Don't ask how I know this......

We got replacement bearings from Raceline. They were very helpful in advising us - had it been a 2.3L engine we would've been in a lot of trouble as they are apparently much more sensitive to bearing size. They usually require the full monty of testing with plastigauge and multiple trial fits. Next we replaced the con rods with ARP items and then torqued everything back into place. The sump was refitted, the engine topped up with a full 5 litres of finest and the key turned. After a few tense turn overs the oil pressure shot up and we connected the ignition for a firing. It all went smoothly and now we have a knock free engine.
 So, to conclude - 1) The marks on the raceline dipstick are not filling lines - make sure the engine has 5L of oil at least and then mark the dipstick yourself. 2) It is possible to change all the bearings with the engine in the car. But avoid it. It's not fun. Really!
Sunday, July 1, 2012
Exhaust Heat Shielding
.jpg) The first upgrade we planned was to heat shield the exhaust headers. I had been warned that there was some radiation from the headers into the footwell, but was not prepared for the reality. As the headers wrap around the drivers footwell they act like the element of an oven. Quite nice at first, but after about an hour's driving your legs start to poach. Any longer than that and in our car at least you can't touch the pedals without shoes on. I once reversed up the drive in socks after a bit of a fang and very nearly crashed. Not terribly smooth when trying to impress bystanders.....!
The first upgrade we planned was to heat shield the exhaust headers. I had been warned that there was some radiation from the headers into the footwell, but was not prepared for the reality. As the headers wrap around the drivers footwell they act like the element of an oven. Quite nice at first, but after about an hour's driving your legs start to poach. Any longer than that and in our car at least you can't touch the pedals without shoes on. I once reversed up the drive in socks after a bit of a fang and very nearly crashed. Not terribly smooth when trying to impress bystanders.....!

Saturday, June 23, 2012
Registered!!
Well, we finally made it. Obviously it wasn't straightforward as, on a typical Melbourne day, we watched a weather front move in across the bay on the radar maps. We must have angered the Gods with our car's unnatural beauty. 45 minutes before the appointment at Vic Roads the heavens opened, wet weather gear was donned and off we went. It rained both there and back, but fortunately there was a space undercover for the actual inspection. The inspector was a very nice chap and clearly a car enthusiast and before we knew it we were the proud owners of a road registered, home built, mobile swimming pool!
 It's a tremendous feeling and the drive home was fantastic. True, rain coats the inside of the screen as much as the outside due to turbulance, making the wipers decorative at best, and the semi slick tyres aren't the greatest when cold and driving through inches of water, but it was the most perfect drive I've had. It brings a huge smile just thinking about it now and needless to say all the effort to get to this stage is worth it for that moment alone!
Now, the real business of gradually upgrading the car begins.......!

Now, the real business of gradually upgrading the car begins.......!
Wednesday, April 11, 2012
High Stop Light
 Great fun to drill and tap the holes. By the end of it you become paranoid that the light is the only thing that's level, and everything else is slanted. Become one with the spirit (level).
The only bright tip I have is that when routing the wiring through the roll bar, I grabbed an string off my trusty electric guitar to use as a mouse. It was flexible enough to pass through the curves, yet stiff enough to be pushed through in one go. Needless to say this brainwave occured after I'd spent an hour trying to drop weighted lines through. Ho hum......
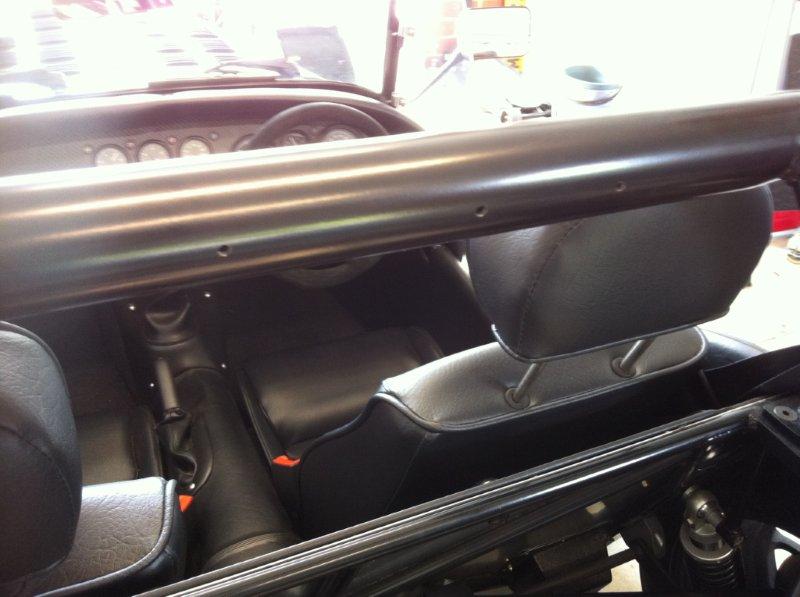
Interior, Roll Cage and seatbelts
Not terribly exciting - however I do have a few tips to make things go smoother. Apologies to those with proper skills - these are aimed at novices like ourselves!
 1) When gluing the carpet, you cannot have enough ventilation. We had both ends of the garage open, and I was wearing a mask with gas filter filtted, but I could only stay in the footwell for a few seconds at a time without being overcome by the fumes. It was very unpleasant, especially when you stand upright afterwards. Make sure someone knows you're in there!
 2) The seats require holes to be drilled for mounting - take your time and allow space for the seatbelt stalks. Our engineer also required the headrests to be strengthened. A change in the ADR's means that they have to be higher, so we had them retrimmed and the mounting bars extended. This didn't bother me as in their original form, when positioned correctly for my head, they were only just inside the seat tubes - not much use if rear-ended by the 4x4 tanks round here! It also cost very little more than a scrap dealer was asking for second hand ute headrests.
 3) There's a hole at the back of the recess for the seatbelt retractor mechanism to sit in. You can't get a socket through it, so I pushed an extension bar through and manouvered the required socket around the side of the mechanism. You can just about get it onto the bar to tighten the retaining bolt, but not to be tried when feeling tired and cranky.
 4) On our chassis, the cross member that is attached to the top of the differential mount and that runs to the base of the roll bar mounting plate did not line up with the bolt hole for the roll bar. We found that you could use mole grips to clamp the boss against the lip of the roll bar mounting plate, thus allowing you to drop the bolt down easily. This can be done with the boot in place by removing a wheel and going through the wheelarch.You can just see the marks, despite having cloth wrapped the jaws. Where's the touch up paint?!
 1) When gluing the carpet, you cannot have enough ventilation. We had both ends of the garage open, and I was wearing a mask with gas filter filtted, but I could only stay in the footwell for a few seconds at a time without being overcome by the fumes. It was very unpleasant, especially when you stand upright afterwards. Make sure someone knows you're in there!
 2) The seats require holes to be drilled for mounting - take your time and allow space for the seatbelt stalks. Our engineer also required the headrests to be strengthened. A change in the ADR's means that they have to be higher, so we had them retrimmed and the mounting bars extended. This didn't bother me as in their original form, when positioned correctly for my head, they were only just inside the seat tubes - not much use if rear-ended by the 4x4 tanks round here! It also cost very little more than a scrap dealer was asking for second hand ute headrests.
 3) There's a hole at the back of the recess for the seatbelt retractor mechanism to sit in. You can't get a socket through it, so I pushed an extension bar through and manouvered the required socket around the side of the mechanism. You can just about get it onto the bar to tighten the retaining bolt, but not to be tried when feeling tired and cranky.
  4) On our chassis, the cross member that is attached to the top of the differential mount and that runs to the base of the roll bar mounting plate did not line up with the bolt hole for the roll bar. We found that you could use mole grips to clamp the boss against the lip of the roll bar mounting plate, thus allowing you to drop the bolt down easily. This can be done with the boot in place by removing a wheel and going through the wheelarch.You can just see the marks, despite having cloth wrapped the jaws. Where's the touch up paint?!
Subscribe to:
Posts (Atom)